The previous article explained the different kind of options on how to interact and explore the DigiChambres API. This article delves deeper into how to use these tools.
SwaggerUI
Purpose
The goal of the Swagger UI is to be the single source of truth for API documentation as it is automatically updated with each release of DigiChambers. In the SwaggerUI every call and every object and their properties are documented.
Components
There are three main components to the Swagger UI. The first one is the header. This is shown in the image below. The header contains general information about the API and the possibility to authenticate yourself to gain authorization.

The next part of the SwaggerUI is the complete list of API calls. This list is grouped per software domain. The groups are ordered alphabetical. So this is not connected to the domain knowledge or order. To understand the domain order, please check the Postman collection.
Below is an image of the list of API calls. Do notice the lock-icons on the right hand side. This means that you need to be authorized to execute this API call.

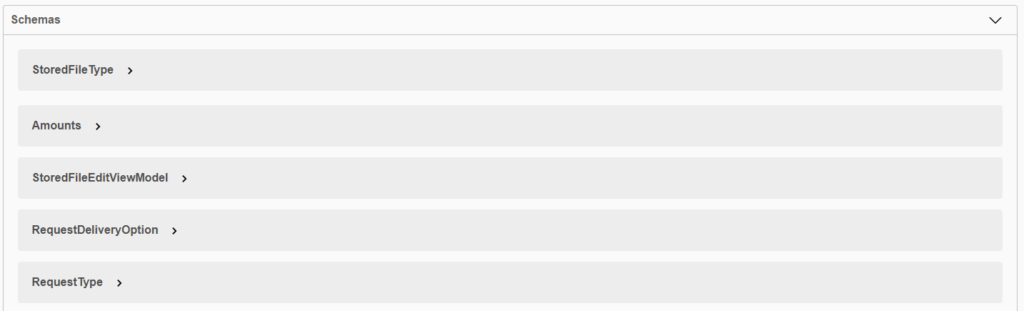
The last big part of the Swagger UI is the list of schemas. This list contains all the models that are used by the API. Next to that, it also contains all the descriptions of the models. The image below shows the list of models.
Models
The model section contains details about all the models used by the API. When clicking one of the elements, it opens up and shows details of that object. Also see the image below.
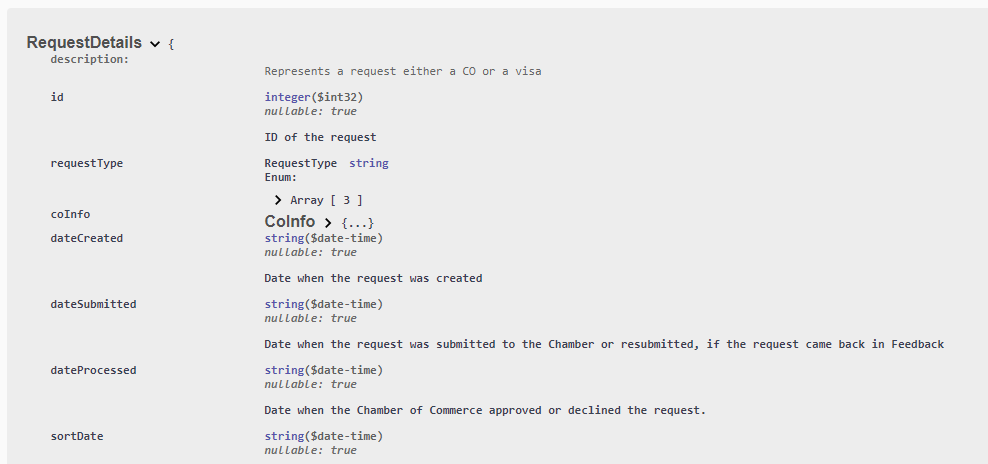
It is important to notice that some properties are primary types (int, string …) while other are arrays or nested types.
API calls
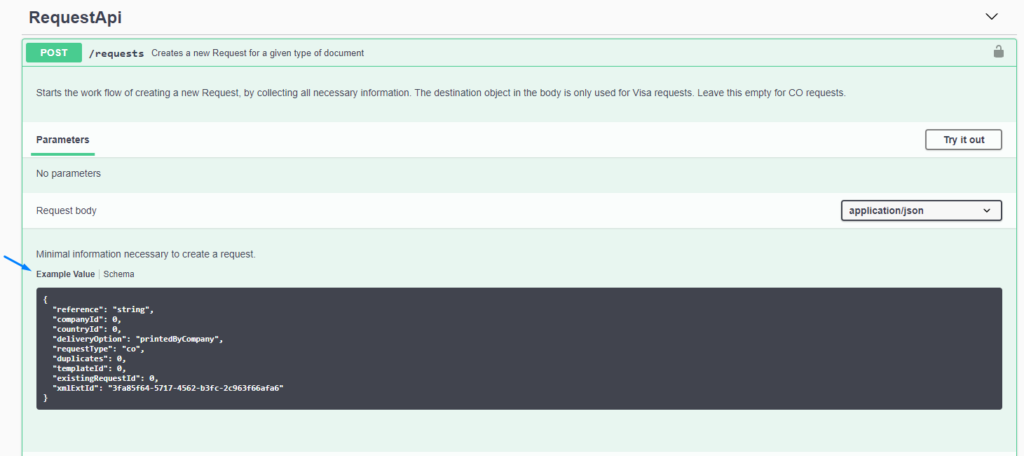
Opening an API call gives you more details about this call. Next to that, it is possible to check the object to send. You can see an example value or the model of that object. Below you can find an image which highlights the example value of the object to send.
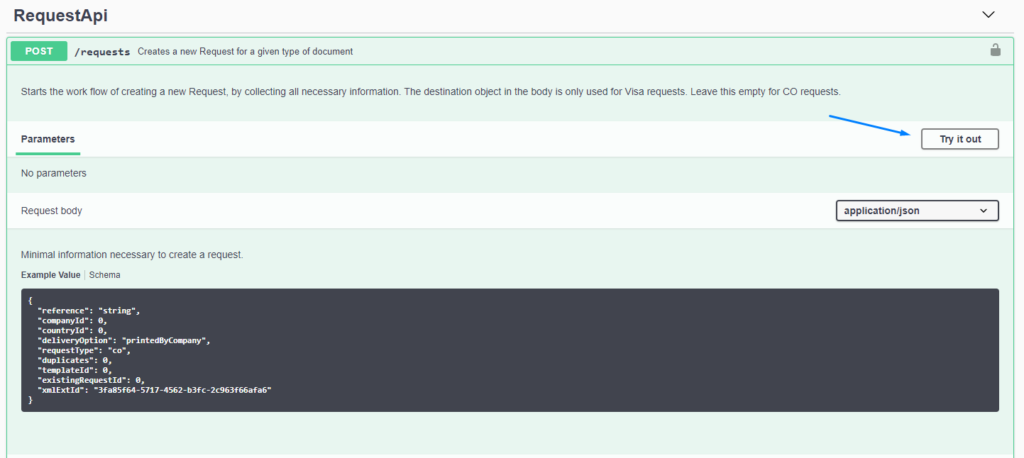
Next to that, it is also possible to test the API call. This can be done with the button Try it out. However, make sure you are authorized to execute the call. Else you will receive a 401 Not Authorized. Below is an image which shows the location of this button.
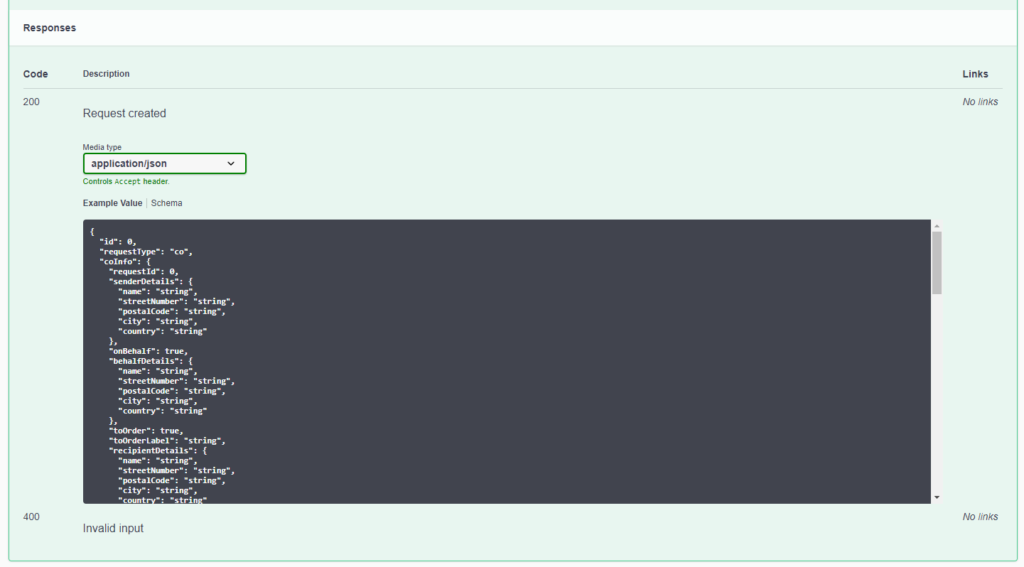
The last part of the details shows the possible responses. This section also contains the response objects.
Postman
Purpose
Postman is an application which is designed for API development. The goal of Postman within the DigiChambers product is to guide API consumers through all necessary steps in the process in the correct order as well as show detailed examples.
Postman does not contain much information about the calls themselves, check the SwaggerUI for this. Postman is used for testing and exploring the API’s responses.
Getting started
The first thing to do, is to get an interactive version of the Postman Collection. Opening up the online version is the best way to get access to the latest version.
To be able to experiment with the collection, you should get your own copy. You can do this by clicking the Run in Postman button. This will open the collection either in a webbrowser version of Postman or in the desktop application.
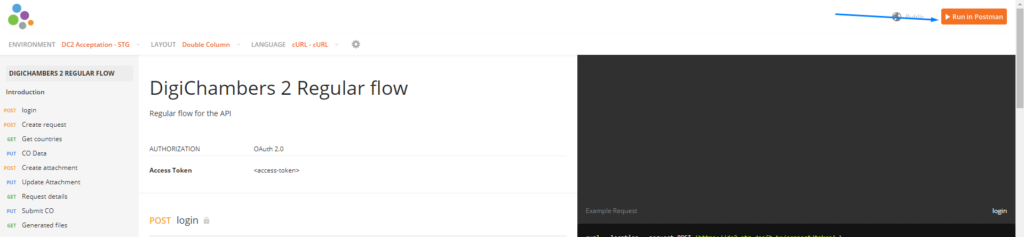
Or with the button below.
Authentication
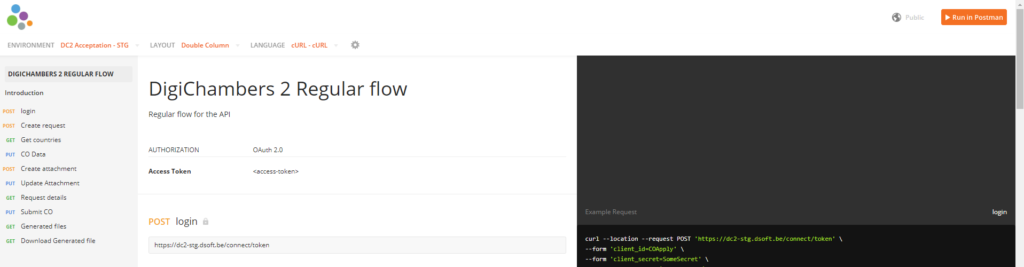
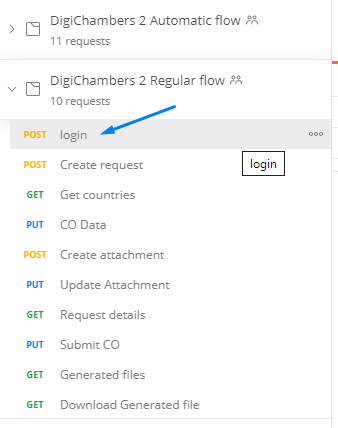
Once you have access to this collection, you can explore the available calls. Let’s explore the first – most basic call, Login. This call can be used to get an identification token (which can then be used to explore the Swagger UI calls – but this is described more detailed in a section below).
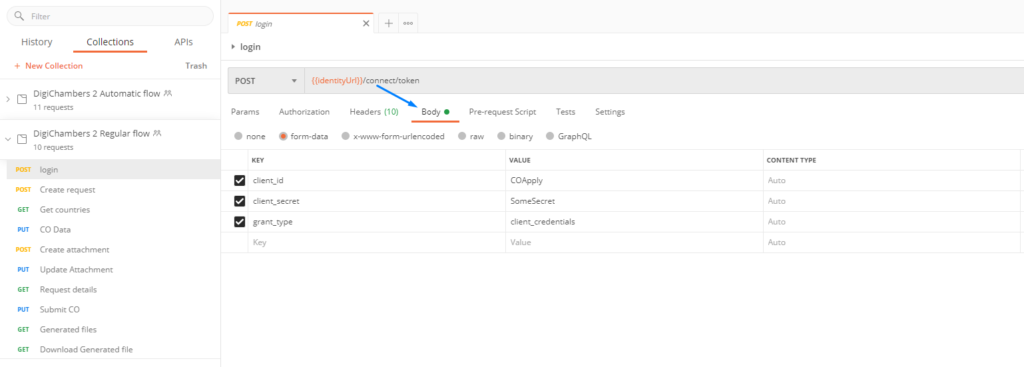
When clicking the call, it will open it in the workspace. A few elements can be found. Most important is the body parameters. For the test purposes a test company was setup with the credentials below. You can use these credentials to follow along.
- Client id: COApply
- Client secret: SomeSecret
- Grant type: client_credentials
When clicking the body tab, you will find that these are filled in as form-data key-value pairs. The illustration below shows how these were filled in.
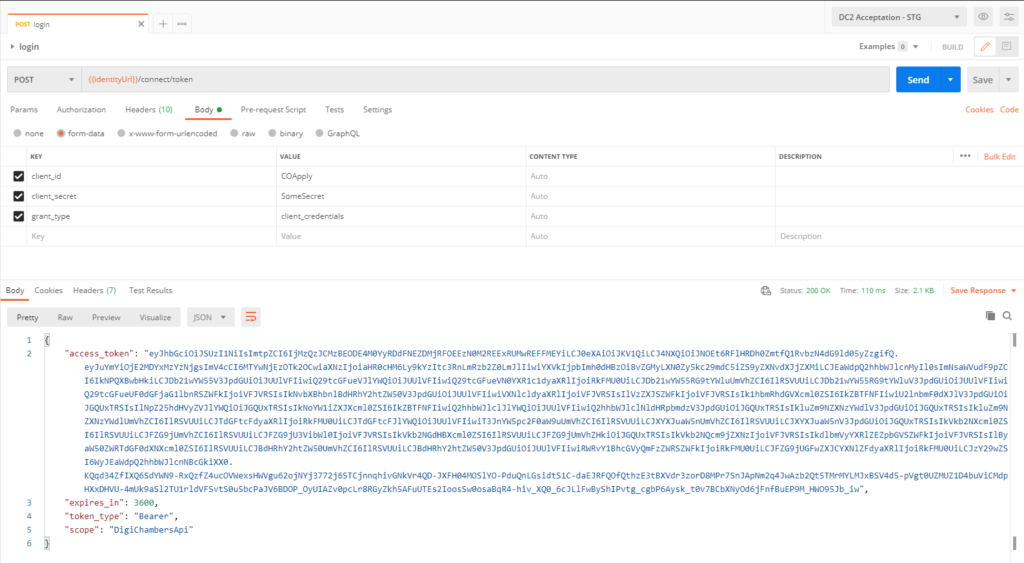
Launching this request by pressing send, will try to establish a connection with the DigiChambers identity server and will ask for an identification token. If the request was successful, a response as shown below, will be shown. It is also good to know that with this token it is possible to authorize yourself in the SwaggerUI.
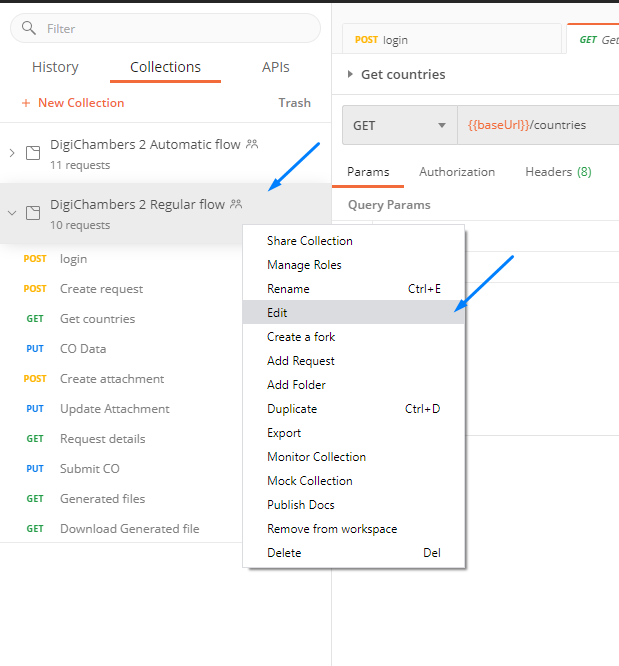
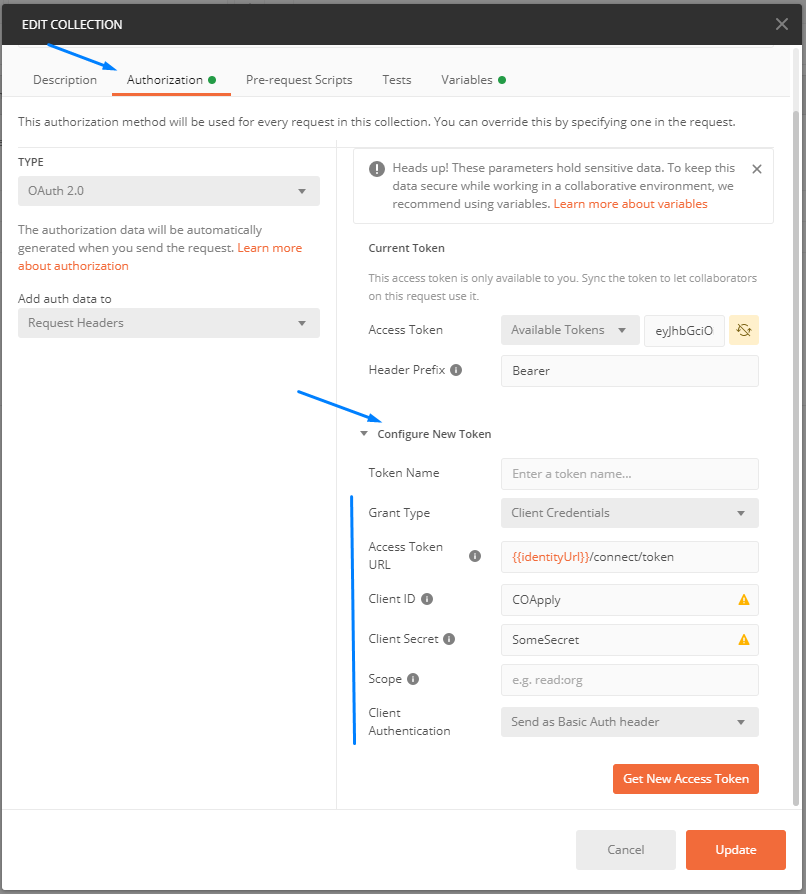
This identification token must be included in every call to the DigiChambers API. It should be in the authorization header of the call. This can also be semi-automated with Postman. By right-clicking the DigiChambers 2 collection and selecting edit, you can find an Authorization tab. By clicking Get New Access Token you can receive a new token. Fill in the parameters as illustrated in the image below. When requesting an access token on this level, it can be used for all API calls in the collection.
With this knowledge, you are capable of working with the DigiChambers API. The next step is to read through all available calls and combine the information. After that, you should research internally where all the data should come from. This will allow you to start created automated requests.
Was this helpful?
1 / 0
[…] Now that you know which tools are available where, it is important to know how to use these fantastic tools. This can be found in the next article. […]